If you're a regular reader of this blog, you'll have seen my last two posts which give an overview of the first two limbs of yoga (scroll down for a look). You'll know that, centuries ago, the sage Patanjali wrote a text on yoga which divided the practice of yoga into 8 parts or "limbs" as a guide for enlightened living. Asanas - the postures that you do in your yoga practice - are the third limb.
To live life in the most balanced way the body needs to be as healthy as possible. The Asanas strengthen and stretch the body completely while allowing the mind and nervous system to be quiet - something that is rare in our busy, hectic culture. In this quiet space, you can really feel how each posture is affected by your breathing and the careful placement and alignment of the body.
A varied Asana practice moves the body through its range of movement, builds up muscle tone and strengthens bones. As the body grows stronger, you notice that the poses you found challenging when you first started yoga are now done with less effort and more ease. This knowledge that your practice is evolving is empowering - you have self-belief.
At the same time that your body is growing stronger, it is also becoming more flexible. The Asanas stretch the muscles and connective tissues, reducing aches, pains and tension. The postures teach you how to breathe so that the muscles relax and, again, they invite you to be in the space where the mind is quiet.
The goal isn't to make your yoga postures perfect, but to be fully present, experiencing how the body feels in each pose. With regular practice, movement of the body becomes free and easeful, and this feeling of light energy becomes the natural way of being.
This Week I am Visiting... Pinnock's Coffee House in High Street, Ripley, Surrey
This cafe is a bit different. It has a whole range of coffees to choose from with enticing descriptions such as Finca Santa Maria from Honduras which has flavours of dark chocolate, nuts and tropical fruit and Grumpy Mule from Bolivia which is caramelly and nutty. I was a bit of a heathen and asked for a decaf cappuccino before I realised what a fabulous menu there was! The coffee is made by a special process in which it slowly drips through filter papers to give it a really smooth taste. If you're not one for coffee, they serve an array of teas and hot chocolates, and offer delicious cakes, breakfasts and lunches too.
 |
| Downstairs |
Pinnock's has a lovely ambience. It is in a beautiful, old building with wooden floors and beams, and the upstairs is furnished with squashy armchairs and sofas so you can really get comfortable. The staff are really friendly and made me feel very welcome, and I will be going back next week to try another interesting blend of coffee. My photos don't really do this lovely place justice, so take a look at their website here where they have lots of their own to show you what it is like.
 |
| Upstairs |
This Week I am Making... Coconut Porridge
As an experiment on food intolerance, I'm not eating wheat at the moment. This makes breakfast a bit tricky - no toast, bread, bagels, museli or cereals! Oats, however, don't contain the same protein that can cause wheat intolerance so porridge is a good option. It's filling and nutritious and you can make it more interesting by adding extras as I've done here.
For a serving for 2 you will need:
1 cup Porridge oats
1 cup Coconut milk
1 cup Water
Almonds or other favourite nuts
Dried cranberries
Honey or maple syrup (but just a little!)

Put the oats in a saucepan and add the coconut milk and water. Bring to the boil and then simmer for about 5 minutes (see packet for exact time), stirring often. Put the porridge into your cereal bowl and stir in half a teaspoon of honey. Sprinkle with nuts and cranberries.

This Week I am Growing... Calendulas
Its time to sow Calendulas for colour that lasts all summer long. Also known as Pot Marigolds, Calendulas are easy to grow and need very little looking after. If you sow the seeds now they'll be flowering by the end of May and will keep on going right through till the frosts next winter! They are hardy annuals (meaning that they'll grow quite happily outside in a cold spring, and that they will grow from seed, flower and then die all in this current year). They will self-seed gently, so you should get brand new plants coming up next year without having to do anything. That's super-easy gardening for you! They're extremely good value for money. I bought this packet for £1.85 and have sown one long row in the veg patch and two seed trays and, as the germination rate is quite high, I am expecting a decent amount of plants for very little effort.

 |
| Lots of seeds for £1.85 |
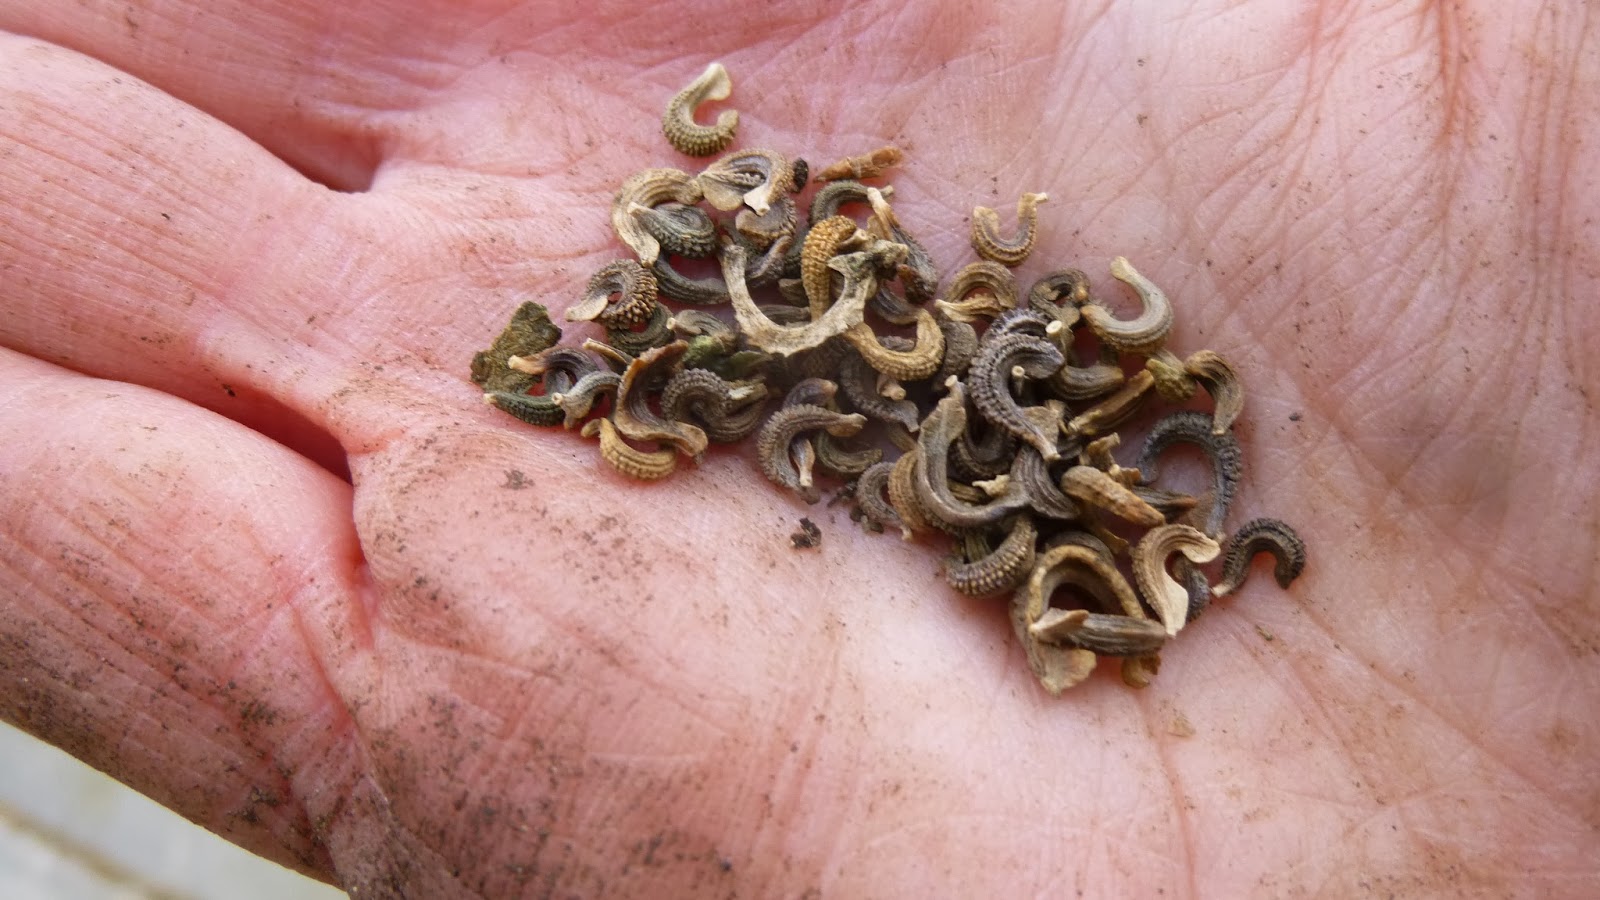 |
| The seeds are a little strange - flat but curved |
You can sow the seeds straight into the soil where you want them to grow, or start them off in a seed tray and plant them out into the garden when they're a bit bigger.
For sowing straight into the garden: fork over the area, removing any weeds and breaking up any big lumps of soil. Make a shallow channel with your finger or a stick to a depth of about 1cm deep. Sprinkle the seeds along the row as evenly as possible. Gently push the soil back over the seeds so that they are just covered, pat down and water if the soil is dry. Label them so you don't think they are weeds and dig them up in a month's time!
 |
| The row of seeds in the veg patch |
If the area of your garden where you want the Calendulas to flower is waterlogged, needs some major renovation, or you just can't decide where you want their final position to be, you can sow the seeds in seed trays and then plant them out into the garden in a few weeks' time: Fill a seed tray with multi-purpose compost and pat down gently so the surface is level. Place the seeds quite sparingly on top of the compost - you don't want them to grow too close together or they'll be competing with each other for light and nutrients. Then cover them with a fine sprinkling of compost, label them and water gently. Put the seed tray somewhere sheltered where you won't forget to water it - mine are up against the patio doors for a bit of extra warmth and protection from the weather. When the seedlings are up and looking sturdy and leafy they can be potted on into bigger pots to keep them growing steadily. I'll share this process with you in a future post.
 |
| The seeds in a seed tray |
No comments:
Post a Comment